


Paths - used in the tutorial as a quick way to select an outline. However, most images won't have them unless somebody has already defined them, so IMHO a relatively pointless thing to teach. If there isn't a path you need to select the part of the image you want using either Magic Wand, Rectangular and Circular marquee, Lasso tool or Quick Selection tool, then copy/paste into the second image. I'll call these "Background", "Image" and "Shadow" layers so it doesn't get too confusing!
Shadows. I admit, this is cool, I should have Googled how to do this ages ago so I'll detail here how to do it for my own future reference:
- Duplicate the Image layer you want to add a shadow to (drag layer down to the New Layer icon - didn't know this!).
- Select Shadow layer (the one below the copy/Image layer), click on "Lock Transparency icon" - the purpose of this wasn't made entirely clear but the explanation provided was, and I quote "this will protect the transparency of this layer, which will allow me to fill the shape with a particular colour without having to make a special selection". Err.. OK, done. (Note: I found this tutorial online, which cleared it up a bit).
- Select a shadow colour from the image (Foreground).
- Choose Edit/Fill and use Foreground colour.
- Edit/Free Transform and shrink height of image, then move below (can also use Skew or any other transform tools, depending on what you're going for).
- Edit any parts of the Shadow that still look disproportionate.
- Change layer transfer mode from "Normal" to "Hard Light".
- Change layer opacity down to about 50%.
- Unlock layer transparency (which we locked in 2.) to be able to blur the image.
- Filter/Blur/Motion Blur and set angle and distance.
Then make changes to the rest of the image, background etc. These seemed to be fairly specific to the image we were working on so I won't go into them all here, except to note the following:
- Background layer - add Hue/Saturation adjustment layer to fade the background out a bit, add Curves adjustment layer to lighten background, make it paler.
- Add a Gradient to the Curves adjustment layer so it fades out as it gets closer to the front of the image - this creates depth (and looks cool). Used black to white, 50% opacity gradient applied from the bottom of the background image, up to the middle of the Image.
- Image layer - add Outer Glow special effect, settings Opacity 50%, Size 25px - this makes the Image stand out more from the background.
 |
| Tutorial 1 - note shadow under log |
Another useful tip - sometimes when you paste an image onto another, you get a thin white "shadow" around the pasted image, which has always been a PITA to remove. Of course there's an easy way, which would have saved me literally HOURS over the years if I'd bothered to look it up, grr...
- Select/Load Selection
- Select/Modify/Contract - 1px
- Select/Inverse
- Edit/Clear
 |
| Tutorial 2 - removalists added - note shadows around feet |
 |
| Tutorial 3 - blending 2 images, layer masks, gradients |

Tutorial 3 & 4 were about adjustment layers, layer masks, gradients, dodge & burn tool and more Curves. I personally wouldn't have done the last step of Tutorial 4 and removed the lovely blue sky, but there you go.
For Tutorial 5 we had to add a toy robot to a panorama of New York City, which involved adjusting the robot to match the background. The most useful things I learned here were:
- If there is a white-ish outline around the inserted image, add an inner glow using a colour from within that image, adjust opacity and size.
- Putting the robot behind the clouds - previously I would have selected & copied the clouds and pasted onto a new layer, but this is easier:
* Layer (on the robot)/Layer Style/Blending Options.
* At the bottom is a heading "Blend if" with 2 sliders, This Layer and Underlying Layer. We can use this to make lighter areas of the underlying layer show through to the top layer.
* Drag the white arrow on the Underlying Layer spectrum down and see the clouds appear through the image, although very pixelated. If you hold down Alt (Windows) or Option (Mac) you can split the slider and drag it back towards the white end of the spectrum, which makes the blending between the 2 layers more gradual. Cool trick. :) - After creating various layer adjustment masks to make all 3 layers match in terms of tone and colour, finish off with a Photo Filter adjustment mask over the whole image (ie. at the top) to bring it all together.
 |
| Tutorial 5 - combining 3 images into 1 (not my feet!) |
 |
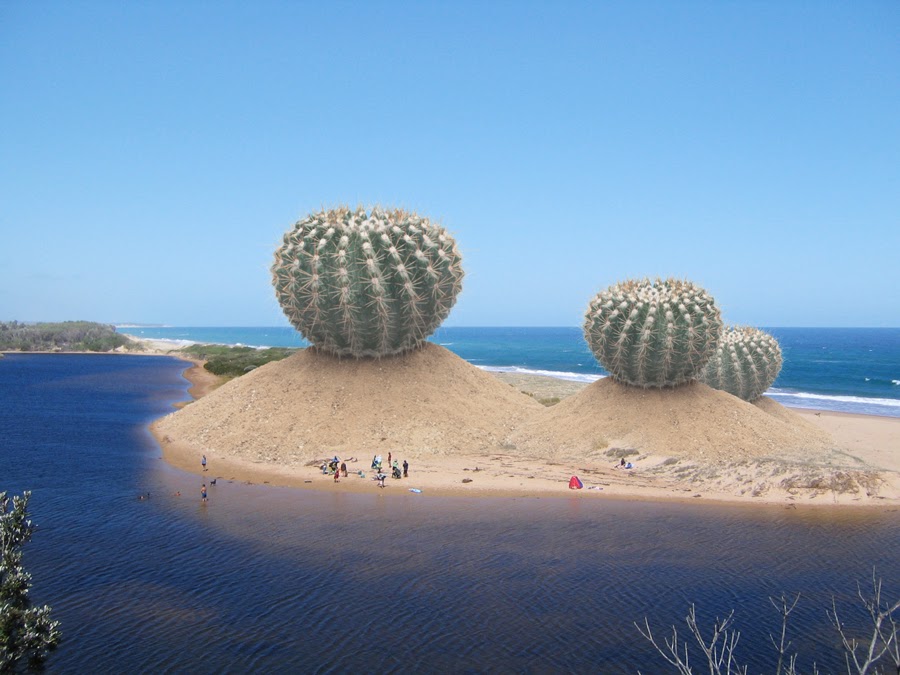
| Tutorial 6 - dinosaur, lake. As you do. |
 |
| Tutorial 7 |
"Recognising Photoshop's limitations is almost as important as understanding it's capabilities."
0 comments:
Post a Comment
COMMENTS ON THIS BLOG ARE FULLY MODERATED.
Comments with backlinks will be marked as Spam and never published.